

On the 27th of October Shima Seiki presented the 4th webinar of their tech series, this time focussing on simulating 3D samples for knitted accessories.
Data within Shima’s unique Apex 4 software is created based on exact numbers of stitches, enabling life like simulations of knitted fabrics and garments, including accessories such as hats, scarves and socks. Real scanned yarns can be used within simulations, achieving realistic drape and surface texture expression.
APEX 4 is the most recent version of Shima’s integrated software programme, whilst users can also access the software remotely with APEXFiz.

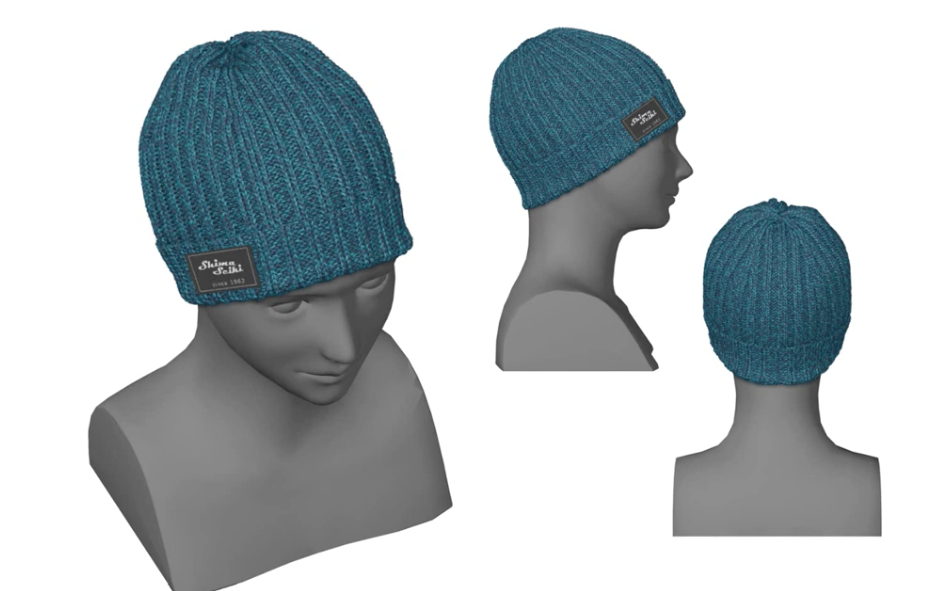
During their webinar, Shima demonstrated how to design and 3D simulate knitted hats and other knitted accessories.
Pattern Creation
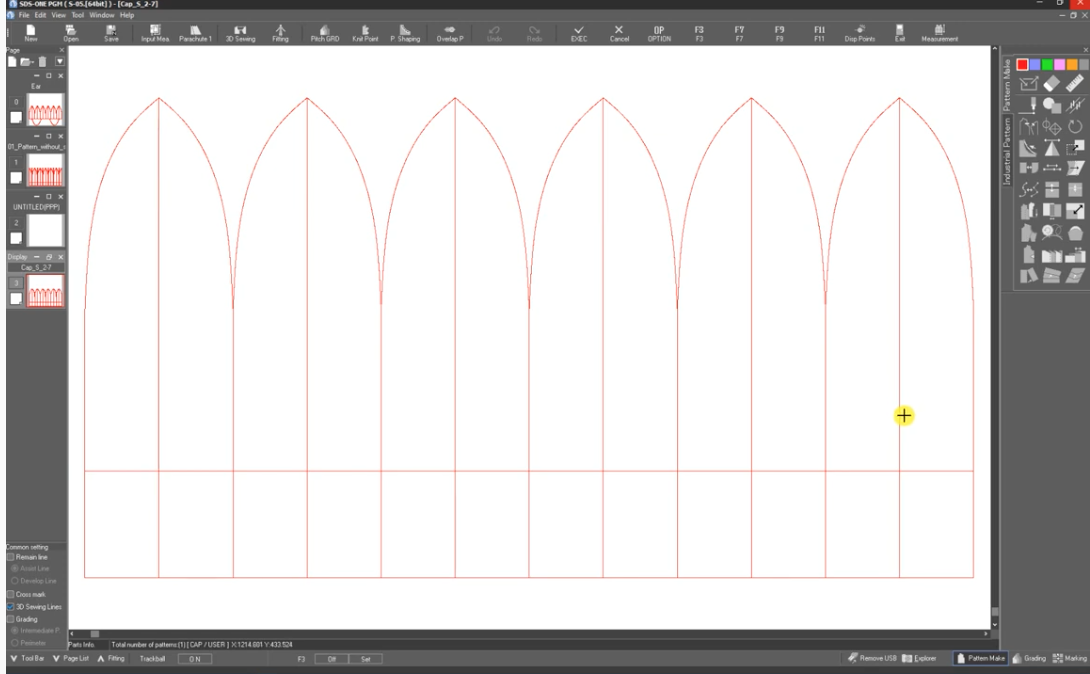
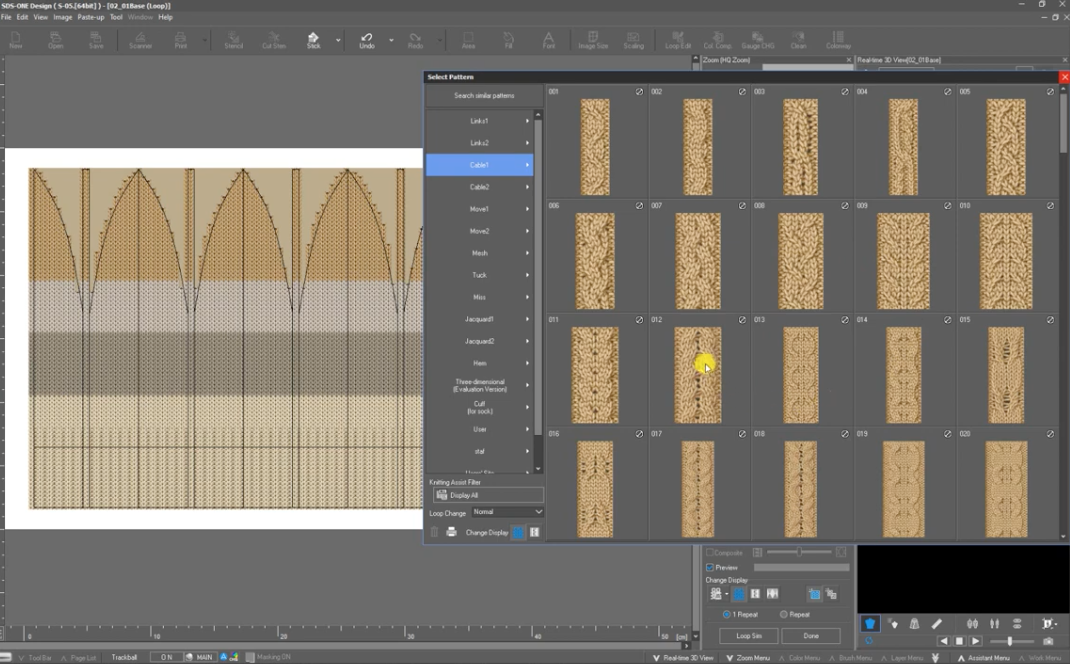
Beginning with garment pattern development, users can choose from the library of templates within APEX 4. Alternatively, measurements from hand drafted patterns can be inputted. These two options mean that the most experienced pattern developers and those with less experience can engage with the software and design well fitted garments and accessories.
The library of patterns contains many different garment types and shapes, from jumpers and dresses to scarves and hats. When a template pattern is selected, the measurement table appears, and amendments can be made to individual units. Helpfully, values auto update to the flat visual of the pattern pieces on the other side of the screen, allowing users to immediately see the impact of the changes they are making in pattern piece form. A red line on the pattern piece indicates which pattern piece is being edited and which shape is being amended, making it easy to identify and visualise.
Much like altering anchor points within programmes such as Adobe Illustrator, pattern pieces can also be adjusted ‘point by point’ by dragging and moving ‘anchor points’. Pattern lines edited in one area can be replicated in others by following the on-screen instructions to ‘copy and paste’ pattern lines.
Avatar Creation and 3D View
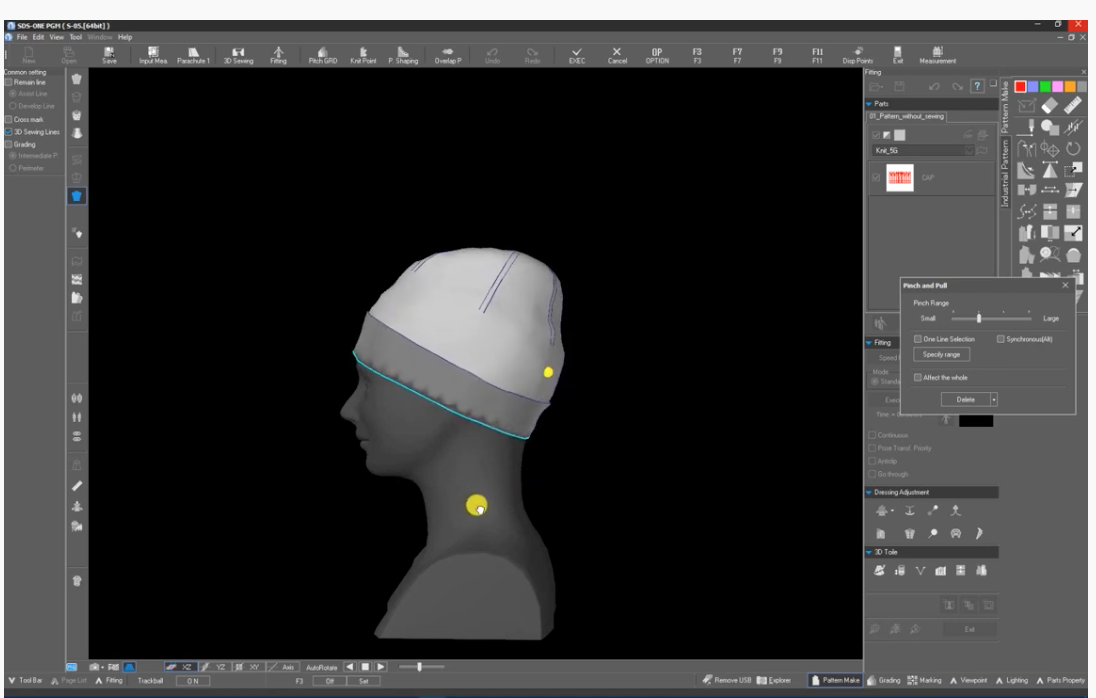
Once the flat pattern is ready, users can select an avatar upon which the pattern can be simulated. APEX 4 has a library of avatars and avatars from other software can be imported too. Once selected, the 3D fitting process begins. On the left side of the screen, the avatar appears, and on the right the flat pattern appears. At this stage, APEX needs to understand where the flat pattern is to be positioned on the avatar.

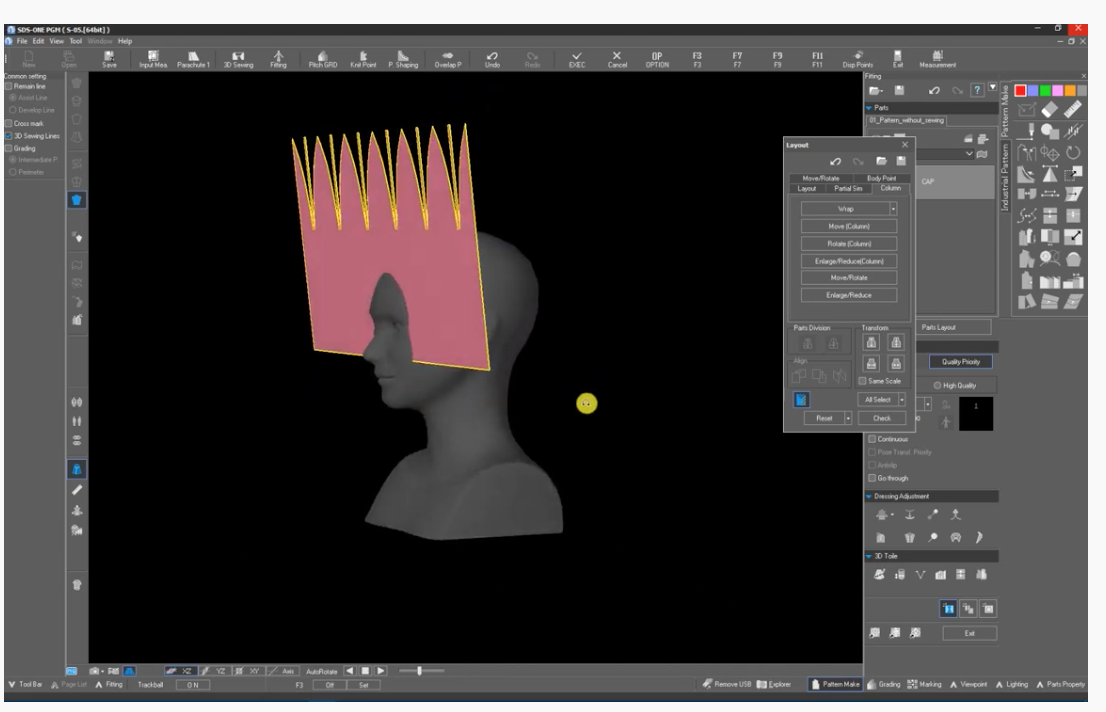
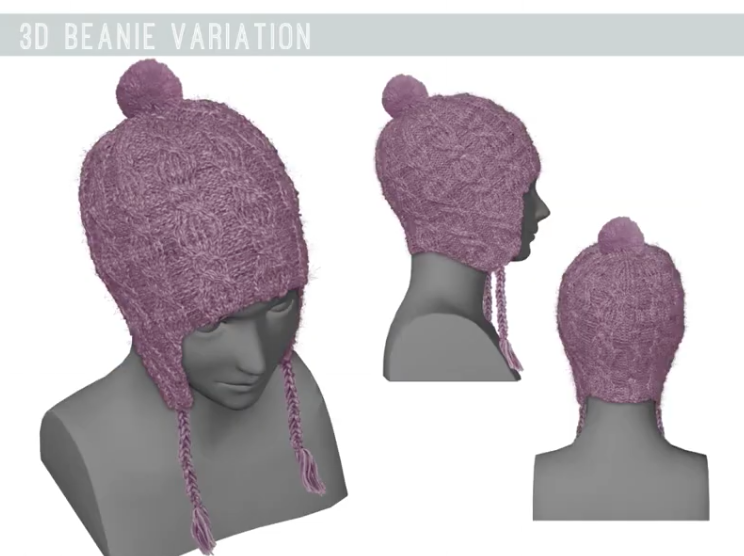
By selecting the ‘wrap’ function, and then selecting ‘360’, the pattern for the hat is wrapped around the head, overlaying the avatar and viewable from 360 degrees.
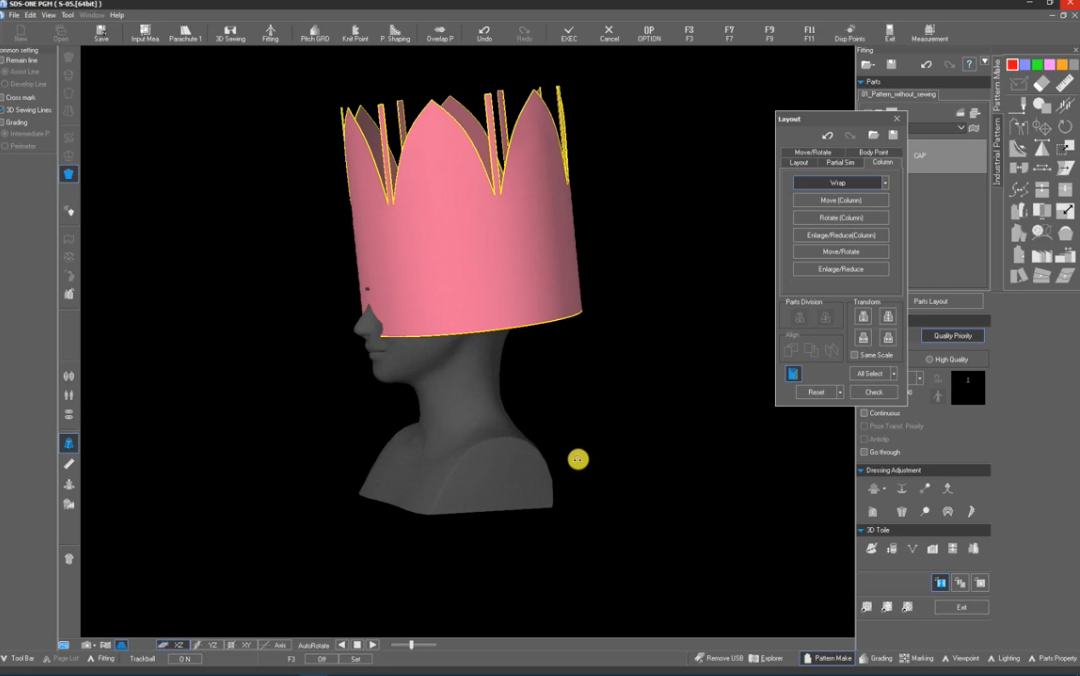
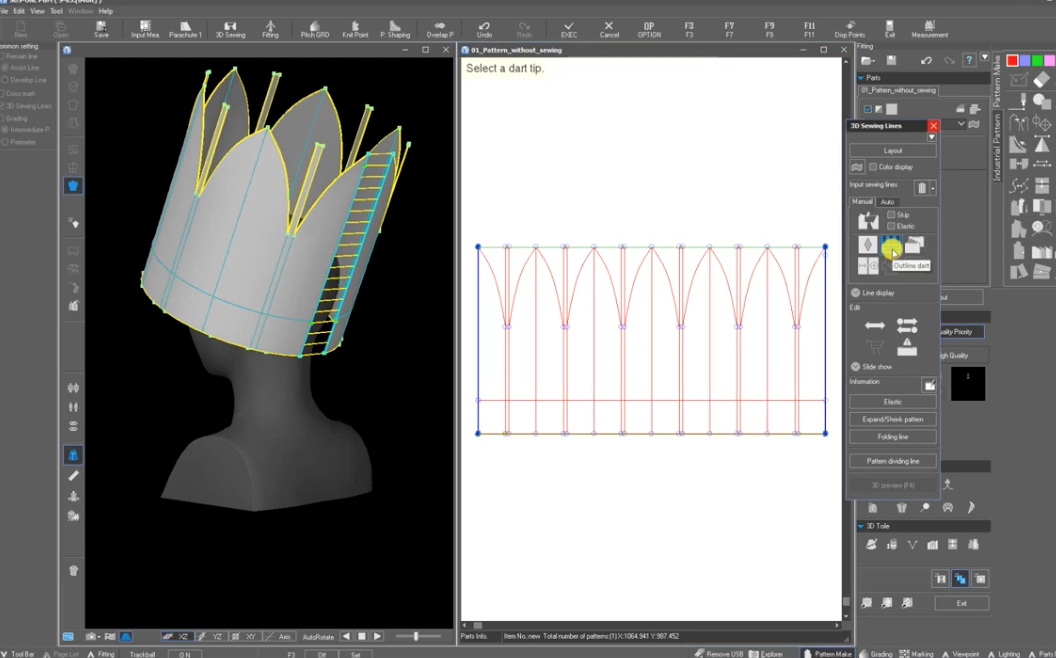
The seams for the garment must then be connected to complete the garment silhouette. This is where the ‘3D sew data’ needs to be added. By clicking the ‘3D sewing’ tool, users can select the lines to connect on the flat pattern, which are replicated on the 3D avatar for clear visual understanding. The hat pattern placement and construction on the avatar is then complete.
Creating a turn up rib hem
For accessories such as hats, and cuffs on jumpers, turn up hems can be simulated.
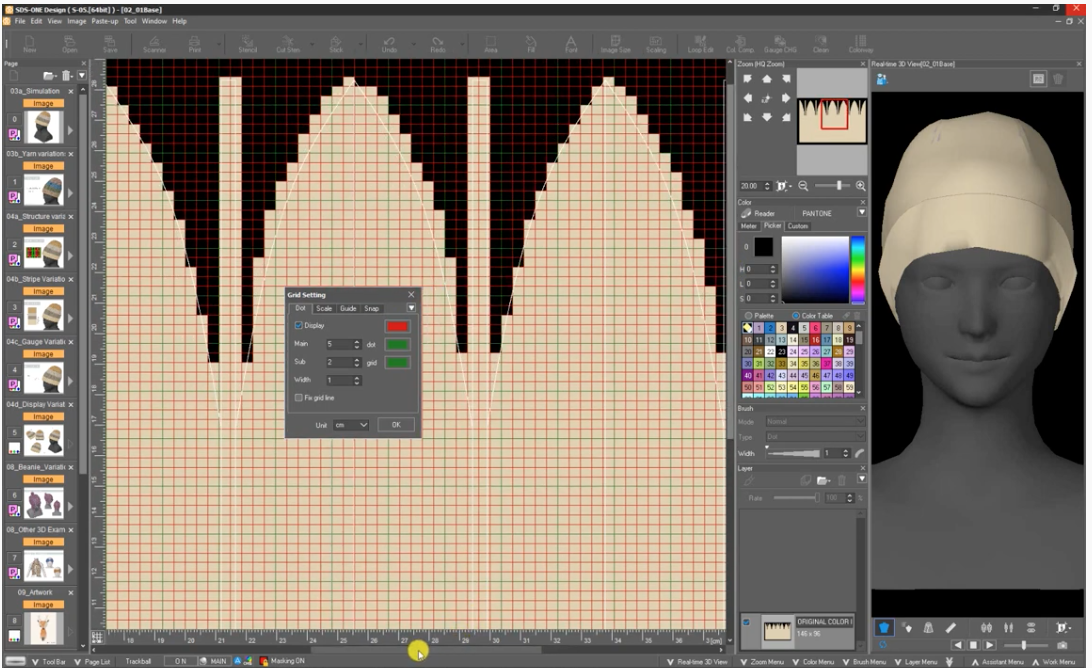
To accurately 3D simulate ribbed structures, shrinkage ratios are required. To express the stretch of the rib, shrinkage factors can be added. As a guide, a factor of 75% will accurately depict a 1X1 rib, whilst an 80% factor will accurately depict a 2X2 rib.
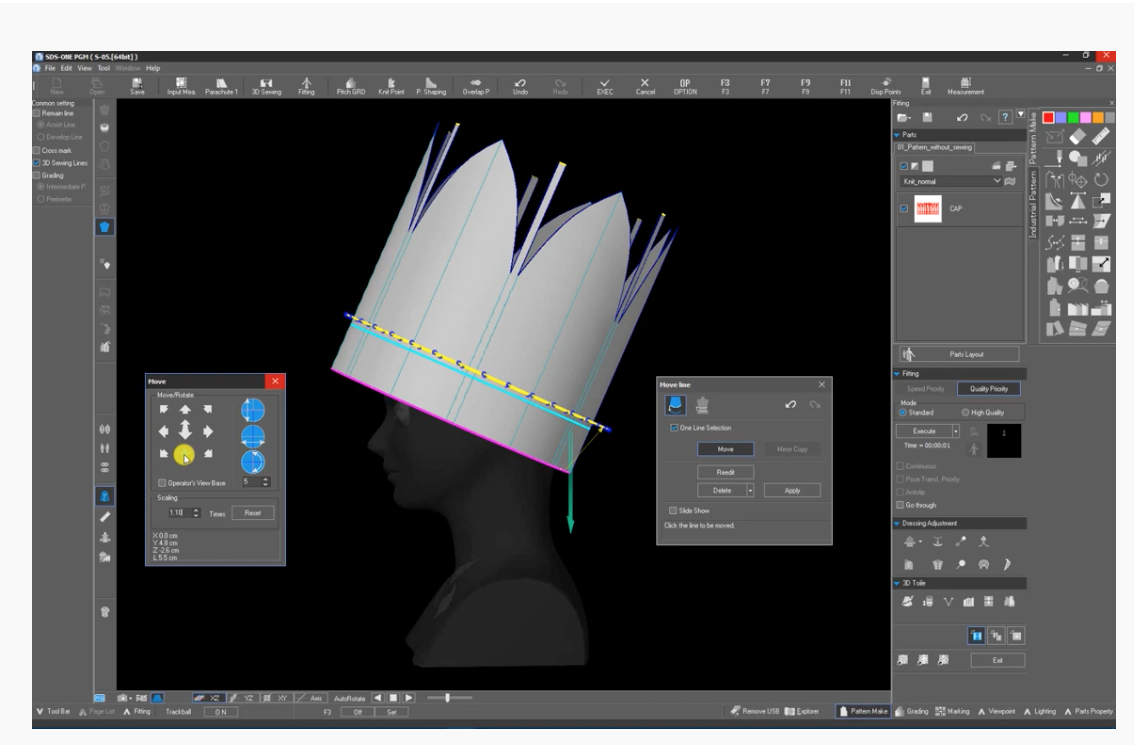
Once the shrinkage factor is added to the hem section, a fold line can be added. This is achieved by using the fold line function and selecting ‘valley fold’ whilst inputting a sharp angle such as 120 degrees. The final step is to move the hem line to sit at the top end of the fold.
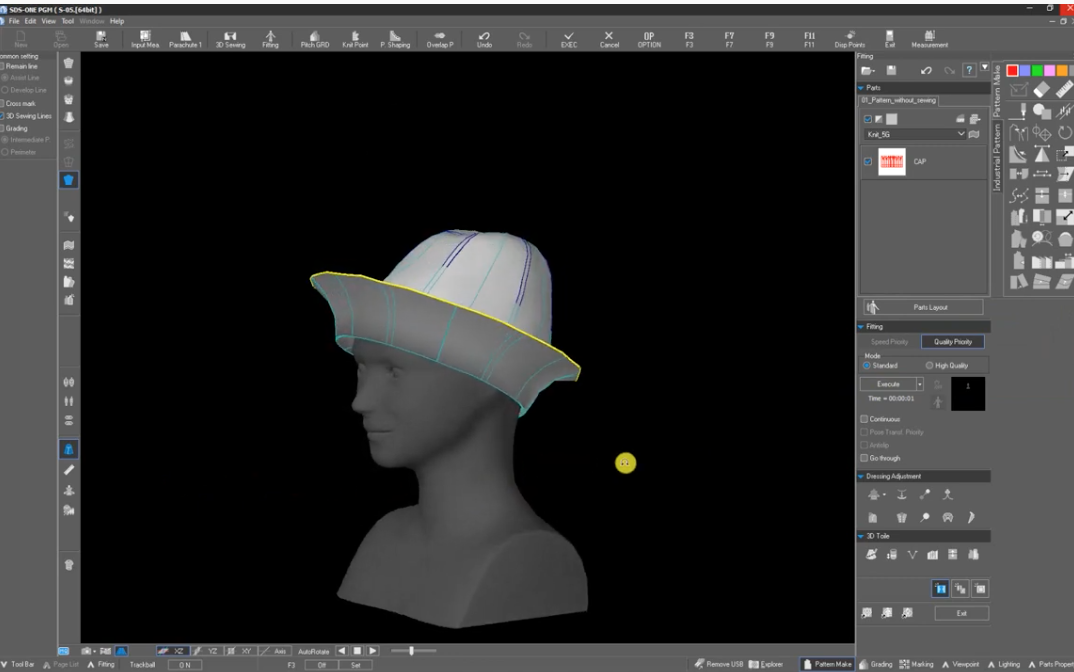
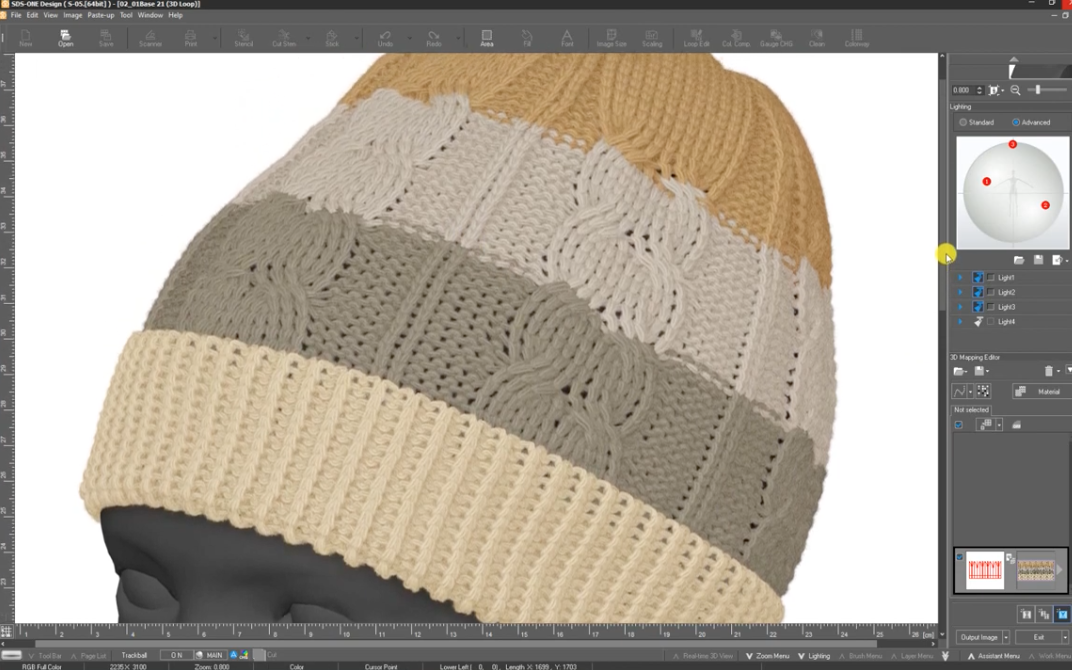
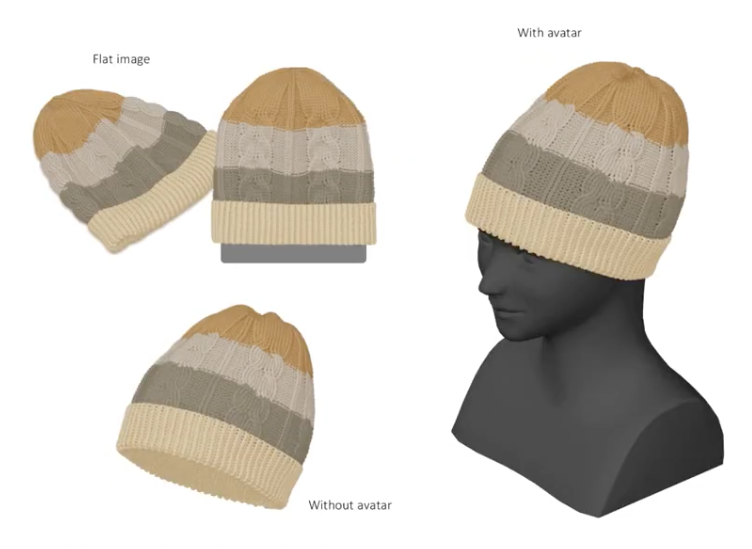
Once the fabric gauge has been selected the simulation process of the accessory begins. The sample can be viewed 360 degrees and pulled and dragged to arrange the fullness and drape like a real fabric. Textile and fabric design can be focussed on next, as the 3D silhouette simulation is complete.
Fabric simulation
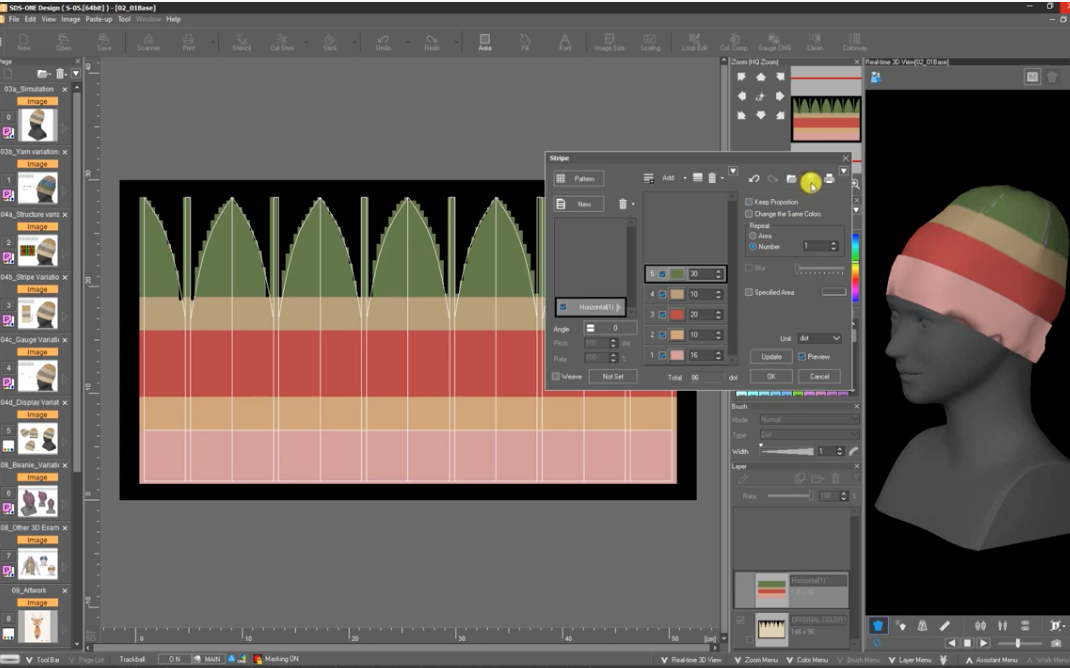
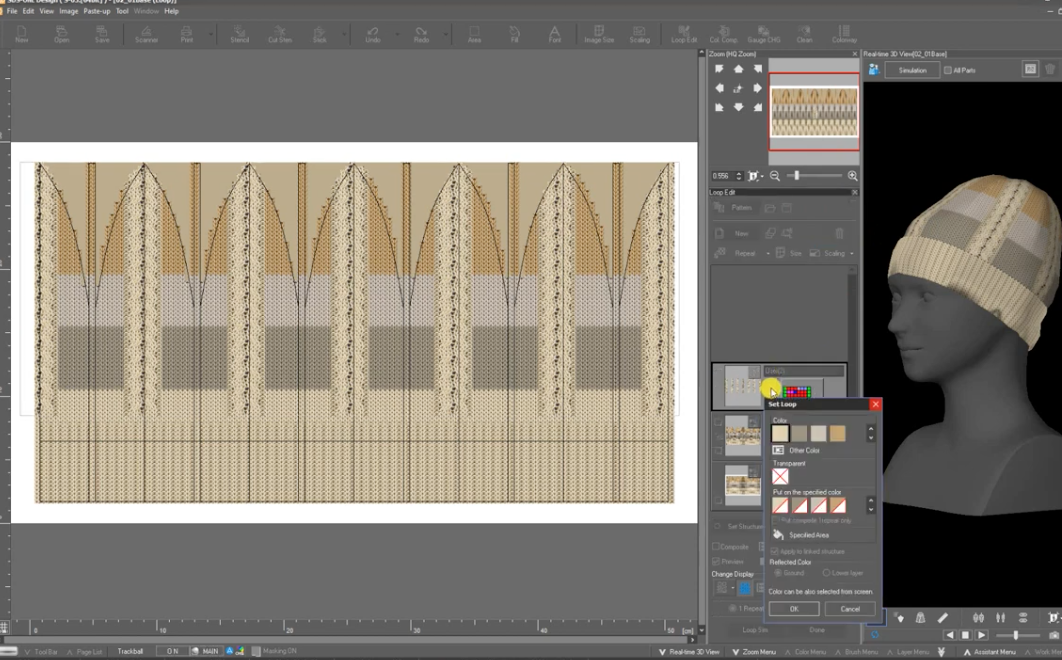
The pattern can now be imported into APEX design software, where the fabric details can be achieved. Wales and courses can be counted in real fabric samples and copied into the fabric count, achieving realistic simulations of pre-existing fabrics. Pattern data is then converted into dots representing each stitch.
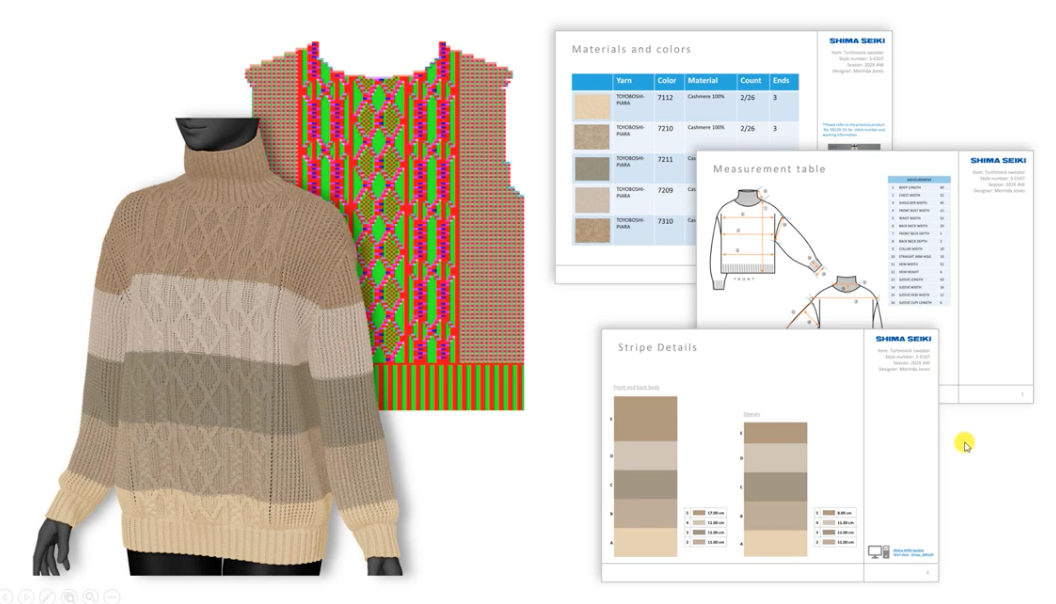
Shima created a striped cable knit fabric for the knitted hat during their webinar, showcasing some of their most useful dedicated fabric design tools. Stripe settings can be auto simulated using the ‘stripe pattern creation tool’, and stitch textures can be selected from the stitch library. Stripe settings can be saved and used across other designs, creating parity and accuracy across collections.

To adjust stripe depths, lines can be dragged along the fabric to visually view proportions, or measurements can be inputted. The overall balance of the stripe design is shown in the 3D real time view window as the flat pattern is adjusted.
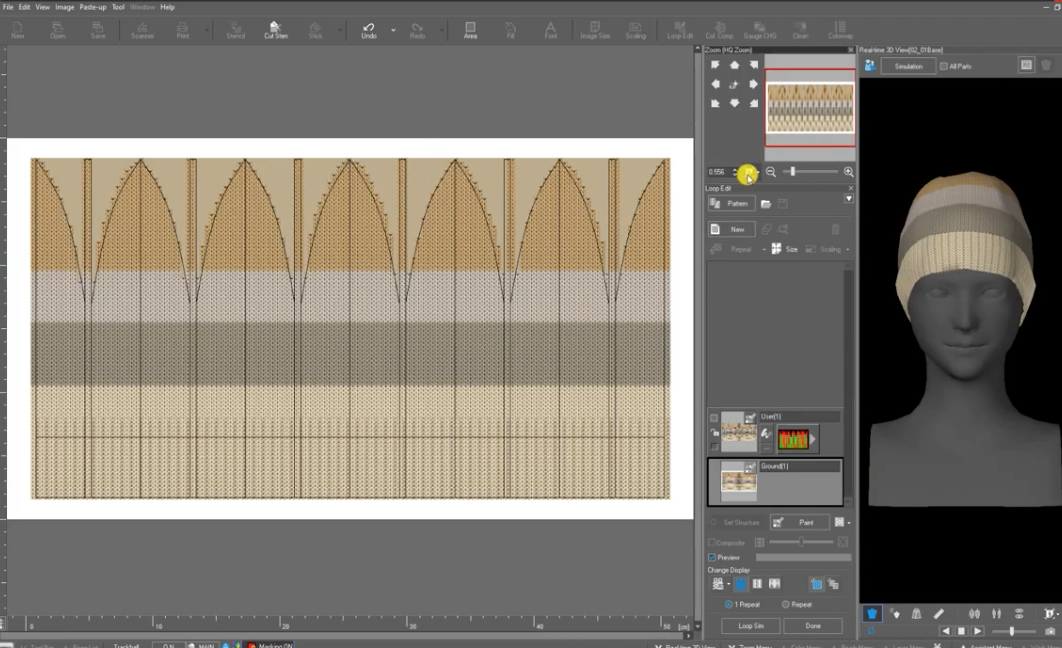
For stitch specific information, ‘Loop Edit’ allows loops to be altered stitch by stitch. The library of structures can be used to select structures and arrange them on the flat pattern pieces too. Stitch patterns can be repeated easily whilst being replicated on the 3D model. This makes for an interactive design development process as the software generates imagery so quickly.
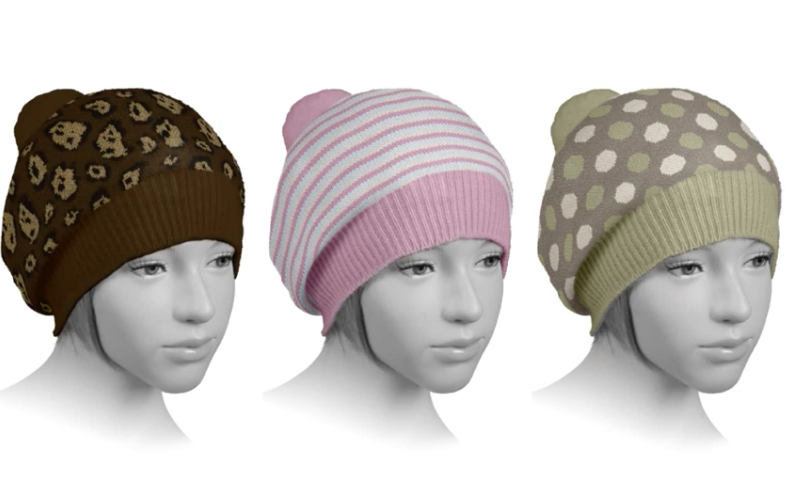
Particularly efficient for time saving when creating colour options is the ability of APEX to auto generate colour options based on selected colour palettes. For example, if APEX registered 24 frequently used colours and users were trying to narrow down 3 within one hat design, APEX could auto generate over 10,000 colour combinations to view. This could save designers time as they would no longer need to colour in CADS and flat drawings.
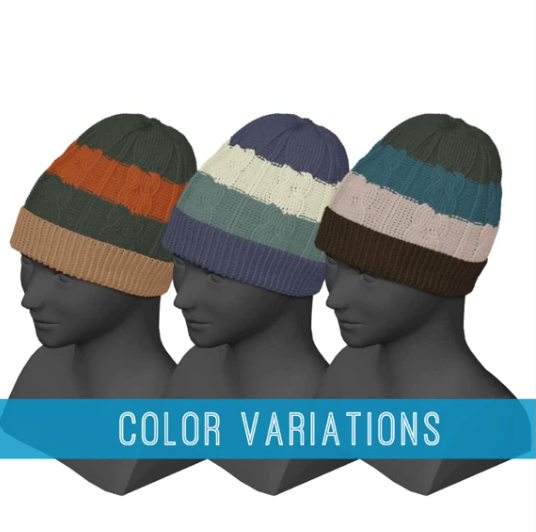
Additionally, with access to one of Shima’s additional pieces of technology – their digital colour scanning device, colours of real fabrics can be scanned and auto inputted into designs. Time spent colour matching and cross referencing to Pantones and other colour references could be saved here, as well as improving colour accuracy.
Rendering
By executing the simulation once the fabric design is complete, the stitch information is combined with the pattern to render the 3D image of the design. Rendering the image takes a fraction of the time of knitting a real product, whilst avoiding generating material waste.
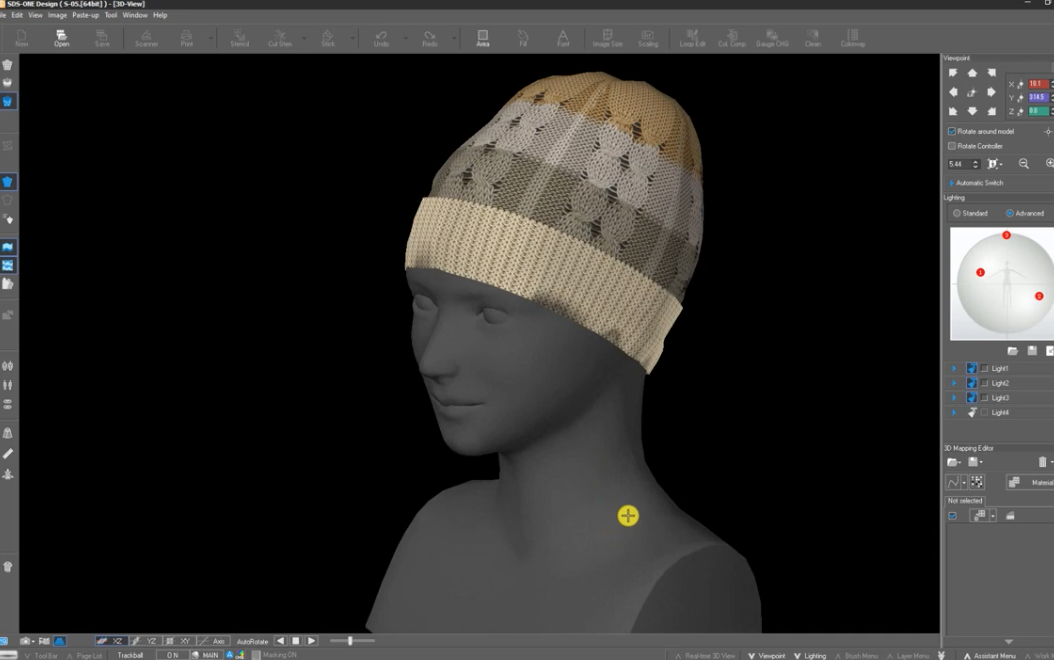
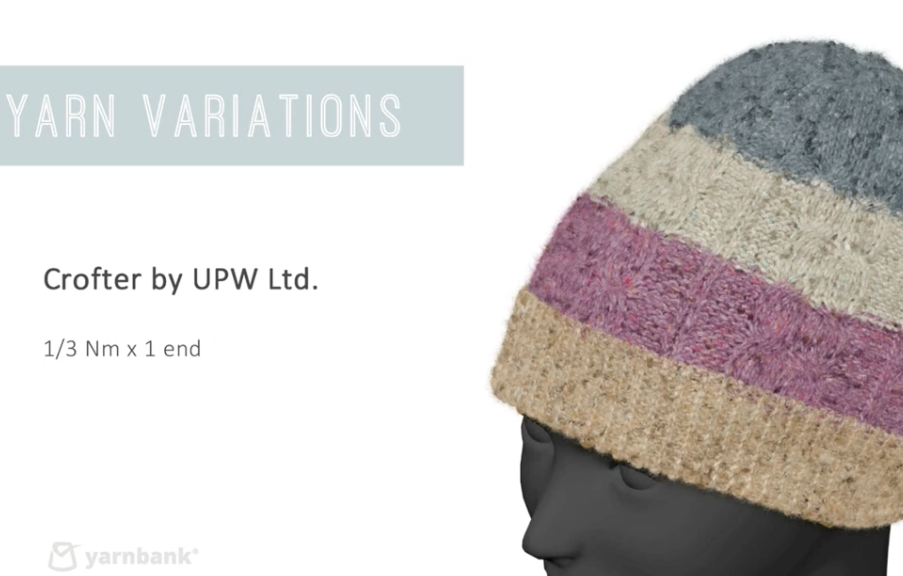
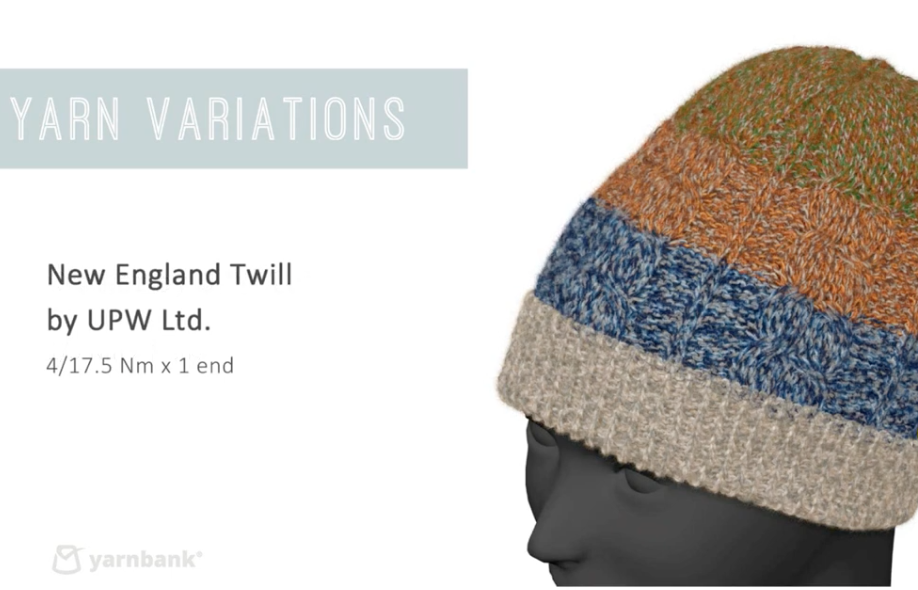
At this stage, real scanned yarns can be inputted to view variations of textures and colours from worldwide industry spinners. Scanning in real yarns can be a time-consuming process, and whilst APEX 4 does have a small library of scanned yarns, the best way to access digital yarns is through utilising Shima’s free online service- Yarnbank.
Yarnbank
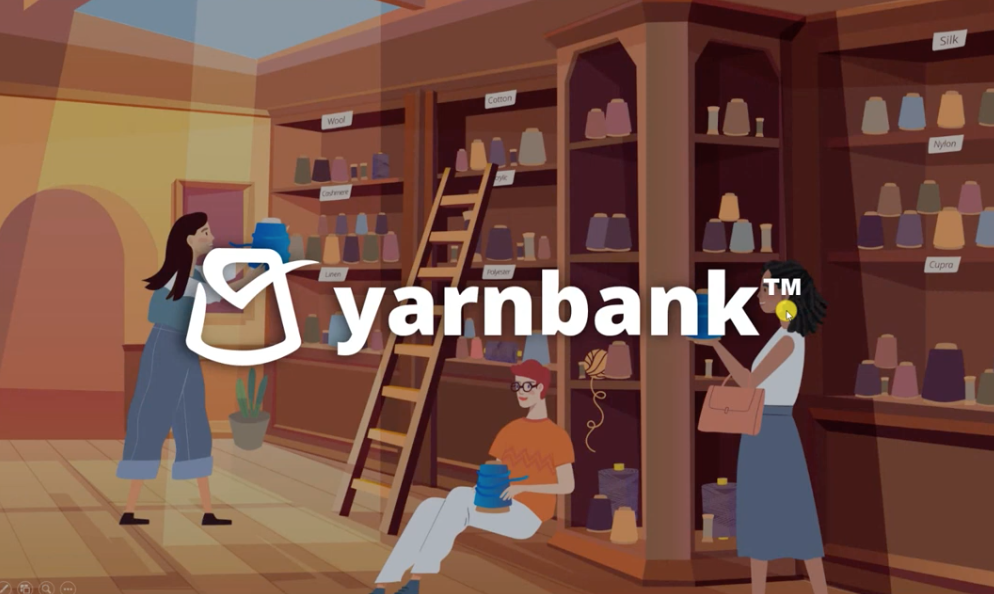
Yarnbank allows designers to browse and search yarns from spinners around the world and download the yarn data for simulations in Apex. Registration is free, and there are many search filters within the home page, making narrowing down yarn searches quick and simple.
When browsing yarns, seasonal shade cards can be viewed. Of course, as this is digital the ‘real life’ colour cannot be truly interpreted, but a very good idea of shade variations and collection sizes can be ascertained.
As well as aesthetic information, wash and care instructions and third-party certification is included with the yarn information. Spinner contact information is detailed alongside shade cards, and direct contact to spinners can be made through contact forms on the site.
Yarn data from all the yarns within Yarnbank can be downloaded into APEX 4 software and added to the 3D fabric and garment simulations, allowing designers to ‘trial’ yarns in correct gauges and stitch structures before ordering sampling quantities. This has the potential to reduce material waste, as yarns can be selected in a more informed process.
Accessory options
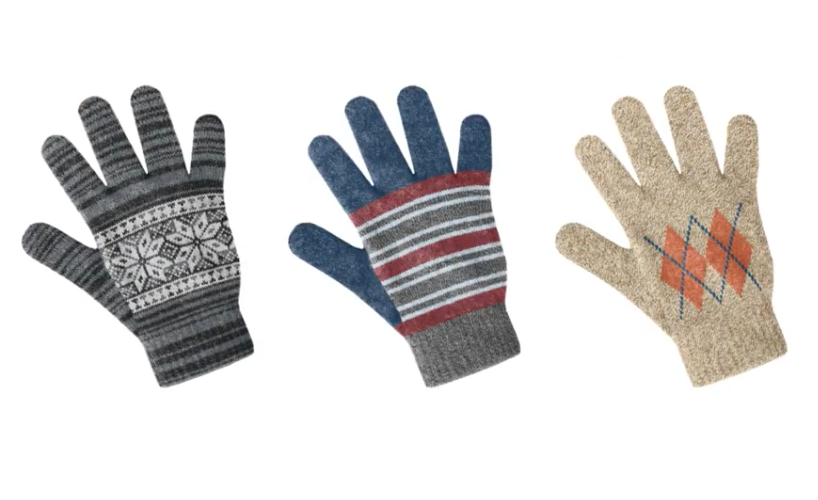
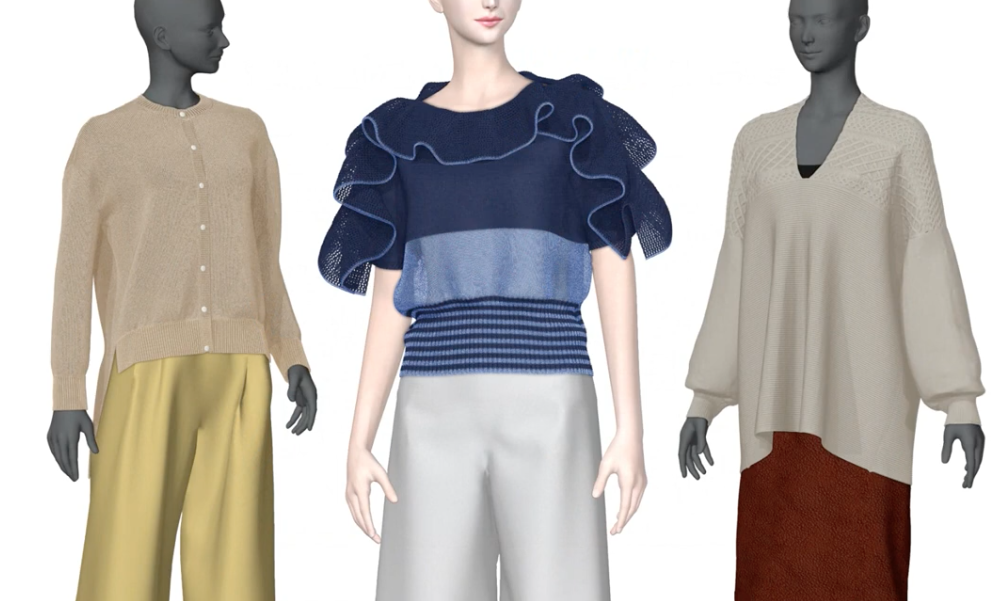
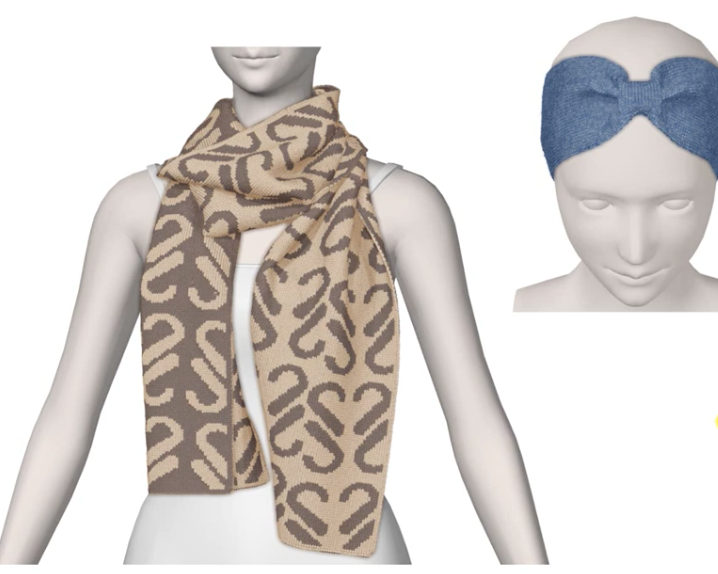
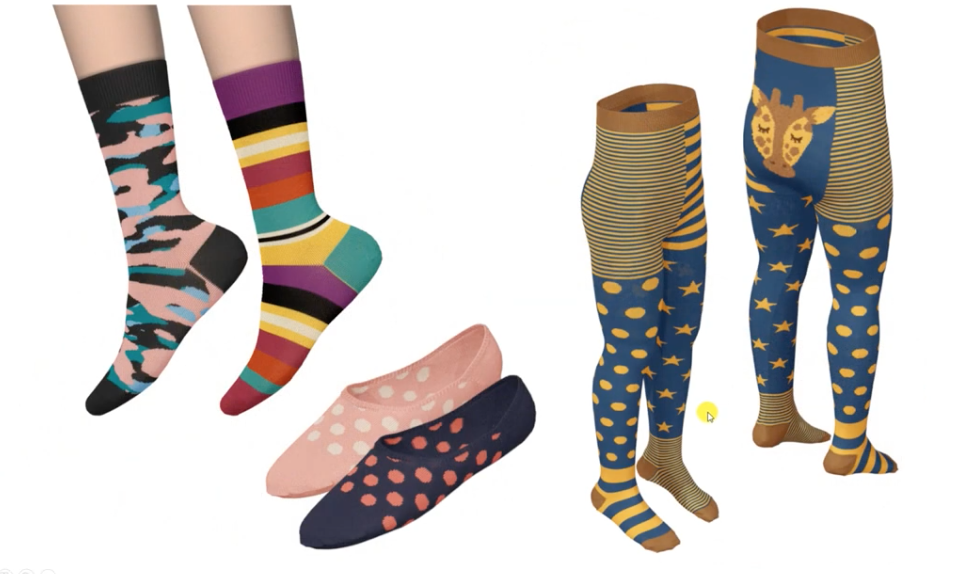
As well as hats, APEX can simulate many more knitted accessories and garments.
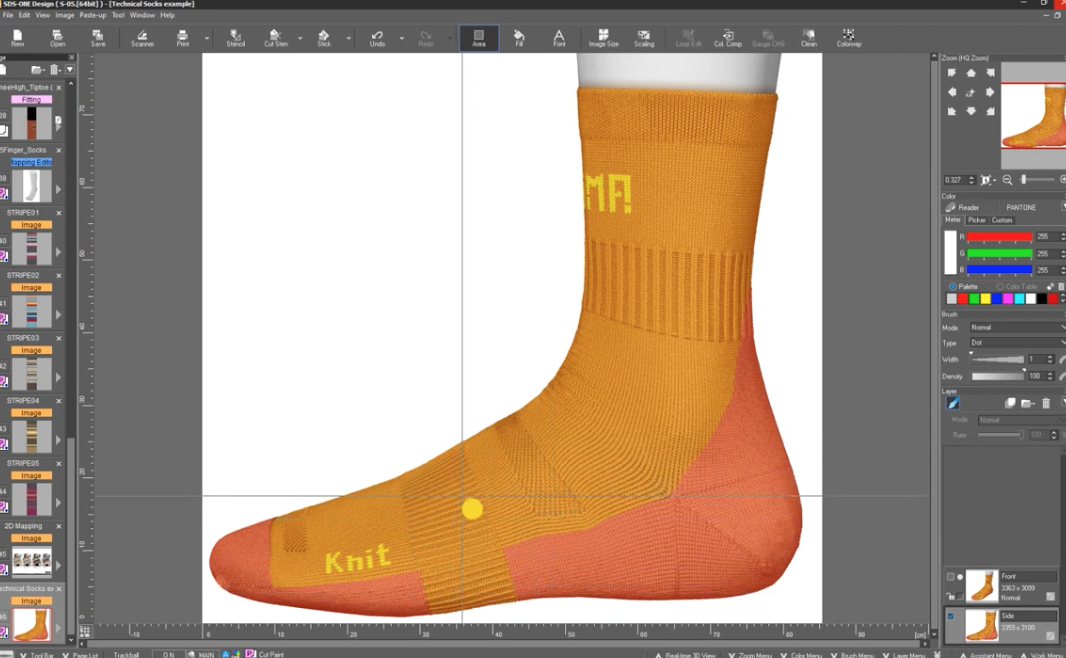
Far more complex designs including technical knitted socks with arch supports and cushioning can be rendered, and surprisingly realistic garments can be digitally created and displayed on avatars or as flat garments.
By 3D sampling first, and generating numerous stitch and colour variations, designers can quickly visualise ideas before narrowing down what to proceed with to physical sampling. Clearly, this offers the potential for reducing material waste within product development.
With all of this said, this software is for flat knitting only, so there are some limitations in rolling this out industry wide. 2.5D mapping can be used though, and this is what Shima will be showcasing in tech webinar Number 5.

Subscribe To Our Newsletter
Join our mailing list to receive the latest news and updates from our team.


